Cross stitch is a low-resolution art form. A 100-stitch-wide pattern has about as much detail as a 100-pixel-wide thumbnail — far less than any photo. The photos that convert well are the ones that still read clearly at that size.
1. One clear subject
Pick a photo with a single obvious subject: one face, one pet, one building. Group photos work only at large sizes, because each face needs at least 30–40 stitches across to be recognisable.
2. Crop tightly
Crop until the subject fills most of the frame. Every stitch of empty background costs time and floss without adding anything. For portraits, crop just above the head and below the shoulders.
3. Simple background
Busy backgrounds — leaves, patterned wallpaper, crowds — turn into confetti. Choose a photo with a plain background, or blur or replace it in a photo editor. Better still, leave the background unstitched: after converting, click its color in the floss list to turn it off.
4. Soft, even light
Overcast daylight or window light gives gentle shading that converts into smooth color bands. Harsh sun creates hard black shadows and blown-out highlights; flash flattens faces and adds red-eye.
5. Strong contrast between subject and background
A black cat on a dark sofa will merge into one shape. Look for photos where the subject is clearly lighter or darker than its surroundings — or fix it with the contrast slider.
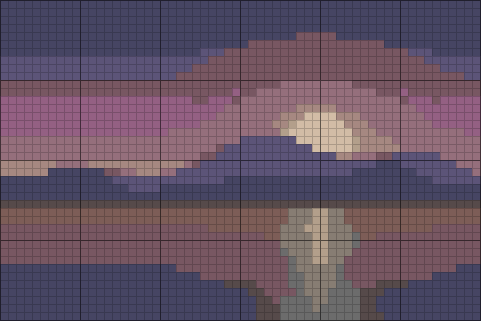 Low contrast
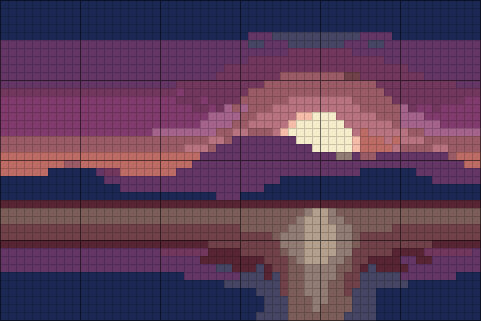 Original
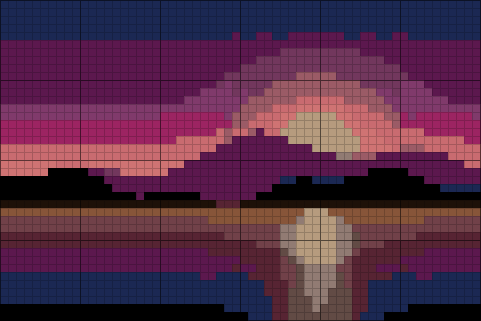 Boosted contrast
6. Sharp focus where it matters
Eyes are what make portraits feel alive. Make sure they're in focus. Motion blur and camera shake become muddy color blends.
7. Not too many colors
Photos with a limited color scheme — a golden retriever on green grass, a red barn under blue sky — convert into cleaner patterns with fewer flosses than photos with every color of the rainbow.
8. Resolution: higher is nice, but not critical
Because the pattern is much smaller than the photo, even a modest phone photo has more than enough resolution. What matters is that the subject itself isn't tiny in the frame. A photo of at least 600 pixels across after cropping is plenty.
9. Think about the final size first
Decide where the piece will go — a 5 × 7 frame, a cushion, a card — then work backwards to the stitch count with the size calculator. If the subject won't fit at a size you're willing to stitch, choose a simpler photo or crop closer.
Quick fixes in any photo editor
| Problem | Fix |
|---|---|
| Too dark | Raise exposure or shadows; in FlossChart, +10 to +20 brightness |
| Flat and gray | Increase contrast or "clarity" |
| Busy background | Blur it, paint it one color, or remove it |
| Color cast (orange indoor light) | Use auto white balance |
| Subject too small | Crop tighter |
Photos that are hard to convert
- Night photos and dark interiors (noise becomes confetti).
- Large groups at small sizes.
- Very fine textures such as lace, hair blowing in the wind or distant foliage.
- Photos with text you need to read (text needs at least 7 stitches of height per letter).
Before and after: a worked example
Imagine a phone photo of a tabby cat on a patterned rug, taken from above in evening lamplight. Converted as-is at 90 stitches, the rug becomes hundreds of confetti stitches, the orange cast turns the gray fur brown, and the cat — only a third of the frame — ends up about 30 stitches across.
Now apply the tips: crop so the cat's head and shoulders fill the frame, fix the white balance, blur the rug and lift the shadows slightly. At the same 90 stitches the face is now about 70 stitches across, the stripes read clearly, and with strong confetti removal the pattern needs 22 colors instead of 35. Leaving the blurred background unstitched removes another third of the stitches. Same photo, same tool — a pattern that is faster to stitch and far more recognisable.
Portraits of people
Faces are the hardest subject because we notice tiny errors in them. Use a front-on or three-quarter view with even light on both sides of the face, avoid sunglasses and hats that shadow the eyes, and give the face at least 60 stitches of width. Skin tones need more colors than most subjects — try 28–36 — and slight extra brightness keeps shadows from turning muddy.
A note on copyright
Only convert photos you took yourself or have permission to use. Making a pattern from a professional photographer's image, a movie still or a character for personal use is a gray area; selling it is generally not allowed.
Ready? Try the photo to cross stitch converter or, for furry friends, the pet portrait pattern maker.