Photo engraving is one of the most satisfying things you can do with a diode or CO₂ laser — and one of the most frustrating when it goes wrong. The good news is that almost every problem comes down to how the image is prepared. The key step is dithering.
Why lasers need dithering
In standard image engraving, the laser moves line by line and decides at each point whether to fire. It cannot easily produce "50% gray" at a single spot. Some machines try to vary power to make grayscale, but results on wood are inconsistent because wood grain burns unevenly.
Dithering solves this by converting the photo into pure black and white dots. Dark areas get many burned dots; light areas get few. From a normal viewing distance, the eye blends them into continuous tone — exactly like a newspaper photo.
Step 1: Choose your engraving resolution (DPI)
Laser photo engraving is controlled by lines per inch (often called DPI or line interval). Your image must contain exactly one pixel per laser dot. Typical starting points:
| Material | Typical DPI | Line interval |
|---|---|---|
| Hardwood (maple, birch plywood) | 254–318 | 0.10–0.08 mm |
| Slate | 254–300 | ~0.1 mm |
| Leather | 200–254 | 0.13–0.10 mm |
| Anodized aluminium | 300–500 | 0.08–0.05 mm |
These are starting values — run a small test grid on scrap material. The right DPI depends on your laser's spot size: if dots overlap too much the image goes dark; if they're too far apart it looks faded.
Step 2: Resize the photo to the exact engraving size
Multiply your engraving size by the DPI. A 4×6 inch engraving at 254 DPI needs an image of 1016×1524 pixels. Resize the photo to that size before dithering.
This matters because dithering works at the individual-pixel level. If you dither at one size and your laser software rescales the image, the pattern is destroyed — you get moiré, blotches or lost detail. In your laser software, make sure "pass-through" (or the equivalent) is on so it uses your pre-dithered pixels directly.
Step 3: Pre-edit the photo
Good engravings start with good source images:
- Remove or simplify the background. Busy backgrounds compete with the subject. A plain light background engraves cleanly.
- Increase contrast. Wood has low contrast compared to a screen. A contrast boost of 15–30% is normal.
- Brighten shadows. Burned dots spread slightly ("dot gain"), so dark areas tend to close up. Raising brightness by 10–20 keeps detail in hair and shadows.
- Sharpen slightly. A touch of sharpening helps facial features survive the conversion.
Step 4: Choose a dithering algorithm
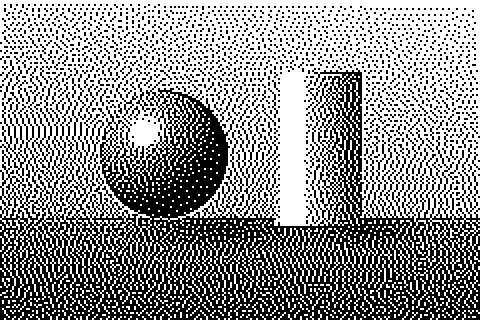 Jarvis–Judice–Ninke
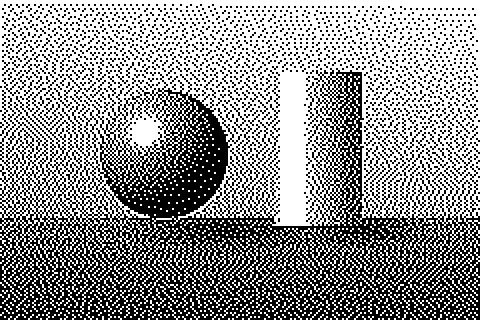 Stucki
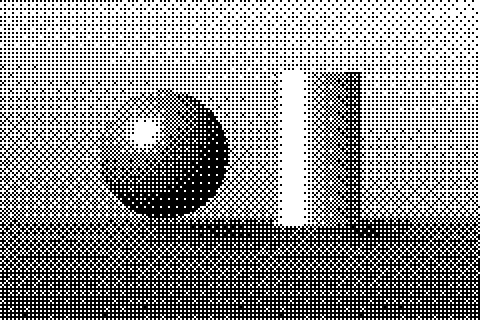 Bayer 8×8 (newsprint look)
- Jarvis–Judice–Ninke — spreads error widely for very smooth tones. A favourite for portraits on wood.
- Stucki — similar smoothness with slightly sharper detail.
- Floyd–Steinberg — sharp and reliable, good on fine-grained materials like anodized aluminium.
- Atkinson — high contrast with clean highlights; good for logos, line-heavy images and pets with light fur.
- Bayer / ordered — a regular grid pattern that gives a deliberate "newsprint" look and engraves very evenly.
Step 5: Invert for light-engraving materials
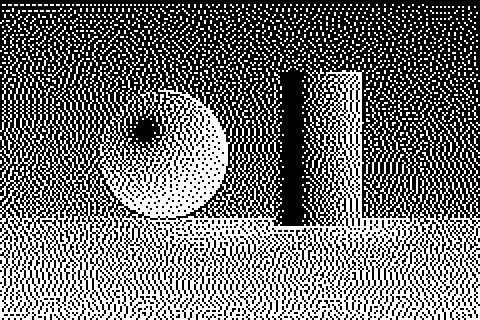
On wood and leather, the laser makes marks darker. On slate, black anodized aluminium, painted tiles or dark acrylic, the engraved area becomes lighter. For these materials, you need to invert the image so the laser burns the highlights, not the shadows.
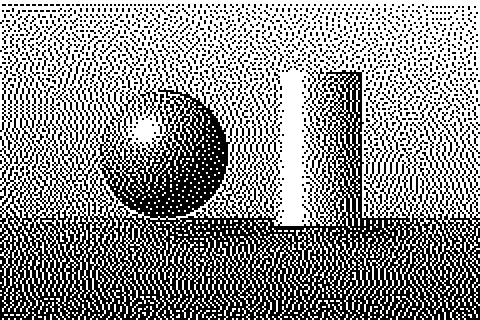 Normal (for wood, leather)
 Inverted (for slate, anodized)
In DitherImage you can do this with the Custom duotone palette: set the shadow color to white and the highlight color to black.
Step 6: Export and engrave
- Download the dithered PNG at 1× scale — never as JPEG.
- Import it into your laser software at the exact physical size you calculated.
- Set the image mode to threshold or pass-through so the software doesn't dither it a second time.
- Match the line interval to your DPI.
- Run a small test patch first, then the full engraving.
Troubleshooting
| Problem | Likely cause | Fix |
|---|---|---|
| Engraving too dark overall | Dot gain, DPI too high, power too high | Brighten image, lower DPI or power |
| Faded, low detail | Power too low or too few dots | Increase contrast, increase power slightly |
| Moiré or stripe patterns | Image rescaled after dithering | Resize first, use pass-through mode |
| Faces look blotchy | Too little contrast, noisy algorithm | Boost contrast, try Jarvis or Stucki |
| Uneven darkness across the piece | Wood grain or unfocused laser | Choose even-grained wood, check focus |
Choosing the right material
Material choice affects photo engravings as much as image preparation:
- Light, even-grained woods such as maple, alder and birch plywood give the best contrast and the most predictable results. Avoid woods with strong grain contrast (oak, pine) for portraits — the grain fights with the dither pattern.
- Slate engraves to a pale gray-white and gives striking, high-contrast photos. Remember to invert the image, and wipe the finished piece with a little oil to deepen the unengraved areas.
- Black anodized aluminium (business cards, phone cases) reveals bright metal beneath and supports very fine detail at high DPI.
- Leather darkens readily and forgives small errors, but its texture limits fine detail — keep images simple and increase contrast.
- Ceramic tiles usually need a coating or marking spray first; follow the coating manufacturer's settings.
Dithering in your laser software vs. in advance
Most laser software can dither images itself, so why prepare them separately? Pre-dithering gives you a precise, full-resolution preview of exactly which dots will be burned, makes it easy to compare algorithms side by side, and keeps the result consistent between different machines and software versions. It also lets you save and reuse a known-good file.
If you prefer to let your laser software dither, the same principles apply: set the image to the final size and DPI first, adjust brightness and contrast, and choose the algorithm based on the guidance above.
Finishing the piece
After engraving, gently clean wood with a soft brush or a slightly damp cloth to remove smoke residue without smudging it into the grain. Masking the surface with transfer tape before engraving prevents most residue in the first place. A clear matte finish protects the engraving and slightly deepens the contrast.
Quick recipe
Portrait on birch plywood: crop tight, remove background, resize at 254 DPI, contrast +20%, brightness +15, Jarvis–Judice–Ninke with serpentine scanning, export PNG at 1×, engrave in pass-through mode.
Prepare your photo now with the Jarvis dithering tool — it runs in your browser, so you can iterate as many times as you like.