Look closely at an old newspaper photo, a 1990s video game, or the screen of an e-reader, and you will find the same trick: images that seem to contain dozens of shades are actually made from just a few colors arranged in clever patterns. That trick is called dithering.
This guide explains what dithering is, why it works, the main families of algorithms, and how to pick the right one — with real examples rendered by the same engine that powers our free dithering tool.
The short definition
Dithering is a technique that simulates colors or shades a device cannot display by arranging the colors it can display in fine patterns. When you look at the result from a normal distance, your eye averages neighbouring pixels together and perceives intermediate tones that are not really there.
A black-and-white printer cannot print gray. But if it prints a pattern where every other dot is black, you see 50% gray. Print one dot in four and you see a light gray. Dithering is simply a systematic way of deciding which dots to print.
Why we need it: the banding problem
Whenever an image is reduced to fewer colors than it was created with — a process called color quantization — each pixel has to be snapped to the nearest available color. Without dithering, large areas of similar tone all snap to the same color, and smooth gradients collapse into hard-edged stripes. This is known as banding or posterization.
 Threshold — no dithering
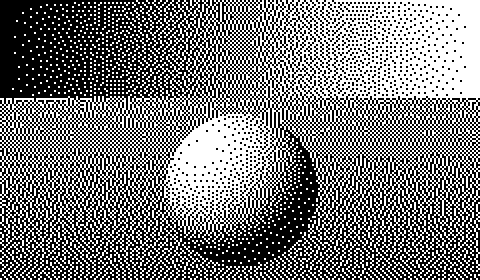 Floyd–Steinberg
Dithering fixes banding by deliberately mixing the available colors so that, on average, each region keeps its original brightness. You trade a little visual noise for a huge gain in perceived tonal detail.
A very short history
The word dither comes from an old English verb meaning to tremble or hesitate. A frequently retold story says that engineers during the Second World War noticed mechanical bombsight computers worked more accurately in flight than on the ground, because the aircraft's vibration kept their gears from sticking — so they added small motors to shake them on purpose. Whether or not every detail is true, the idea stuck: adding a little controlled noise can make a system more accurate.
In digital imaging, the key milestones came in quick succession:
- 1973 — Bryce Bayer at Kodak published the ordered dithering matrix that still bears his name.
- 1976 — Robert Floyd and Louis Steinberg introduced error diffusion, and Jarvis, Judice and Ninke published their wider kernel the same year.
- 1984 — Bill Atkinson's variant gave the original Apple Macintosh its crisp black-and-white look.
- 1980s–90s — limited palettes on home computers, consoles and the 256-color GIF format made dithering everywhere.
Today displays can show millions of colors, but dithering is far from dead. It is essential for e-ink screens, laser engravers, thermal printers and screen printing — and it has become a deliberate visual style in pixel art, indie games and graphic design.
The three families of dithering
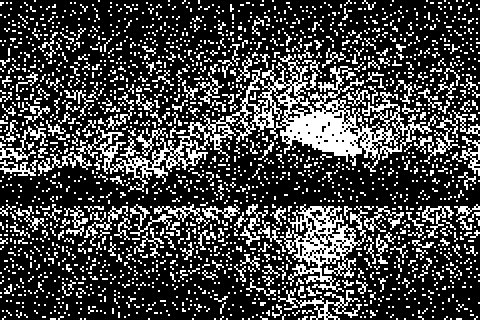 Random (noise)
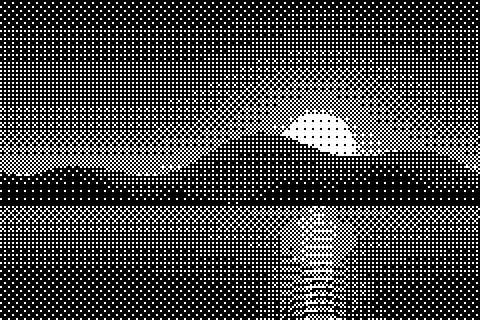 Ordered (Bayer 4×4)
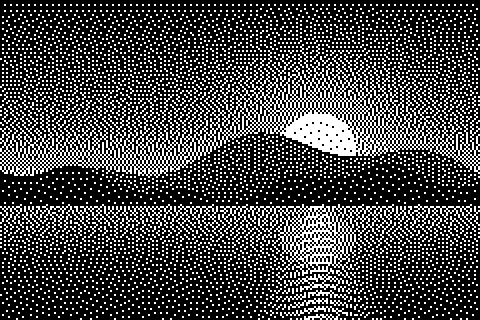 Error diffusion (Floyd–Steinberg)
1. Random (noise) dithering
The simplest approach adds random noise to every pixel before rounding it to the nearest color. Bright pixels are still more likely to become white and dark pixels black, so the average tone is preserved. The drawback is obvious: the result looks grainy and loses fine detail. Today random dithering is mostly used as a stylistic "photocopy" effect.
2. Ordered dithering
Ordered dithering replaces random noise with a small repeating threshold map, usually a Bayer matrix of 2×2, 4×4 or 8×8 cells. Each pixel is compared against the matching cell in the map, which produces regular crosshatch patterns.
Because every pixel is processed independently, ordered dithering is extremely fast and perfectly stable: the same input always produces the same pattern in the same place. That makes it ideal for animation and GIFs, where other methods cause distracting "crawling" between frames. It is also the source of the iconic retro-computer look. Read more in our Bayer dithering page.
3. Error diffusion
Error diffusion is the most popular family for photographs. The algorithm walks through the image pixel by pixel. For each one it picks the nearest available color, measures the difference between the original value and the chosen color — the quantization error — and spreads that error onto neighbouring pixels that have not been processed yet.
If a mid-gray pixel is rounded down to black, its neighbours get a little brighter to compensate, making them more likely to become white. Over the whole image, the error never accumulates, so local brightness is preserved with remarkable accuracy and edges stay sharp.
Different error diffusion algorithms differ only in how the error is shared out:
- Floyd–Steinberg — four neighbours; fast, sharp, the classic default.
- Atkinson — six neighbours but only 75% of the error; high contrast, clean highlights.
- Jarvis–Judice–Ninke and Stucki — twelve neighbours; the smoothest gradients.
- Burkes and the Sierra family — speed/quality compromises between the two.
Dithering with color palettes
Everything above applies to color too. Instead of choosing between black and white, the algorithm chooses the nearest color from a palette — for example the 16 colors of the PICO-8 fantasy console or the four shades of the Game Boy — and diffuses the error separately for red, green and blue.
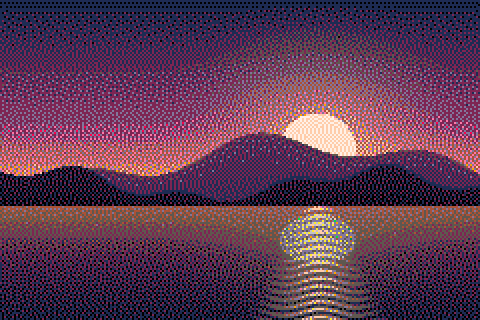 PICO-8 + Floyd–Steinberg
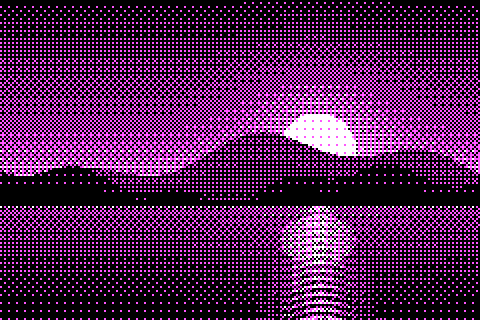 CGA + Bayer 4×4
The fewer colors in the palette, the more important dithering becomes. With four garish CGA colors, patterns are the only way to suggest skin tones or a sunset.
How to choose an algorithm
| If you want… | Use |
|---|---|
| A reliable default for photos | Floyd–Steinberg |
| Crisp, high-contrast, classic Mac look | Atkinson |
| The smoothest gradients and skin tones | Stucki or Jarvis–Judice–Ninke |
| Retro game crosshatch, animation, GIFs | Bayer 4×4 or 8×8 |
| Flat, posterized shapes or stencils | Threshold (no dithering) |
| Gritty, analog grain | Random noise |
Practical tips for better results
- Resize first, dither last. Dithering patterns are made of individual pixels. If you dither and then scale the image, the pattern turns to mush. Always resize to the final output size, then dither.
- Boost contrast slightly. Dithered images tend to look flatter than the original. A 10–20% contrast increase usually helps.
- Use serpentine scanning. Alternating the scan direction on every row breaks up the diagonal "worm" artifacts of error diffusion.
- Export as PNG. JPEG compression smears dithering patterns. PNG keeps every pixel exact and compresses dithered images very efficiently.
- Scale up with nearest-neighbour. If you enlarge a dithered image, use nearest-neighbour scaling so each pixel stays a crisp square.
Dithering beyond images
The same idea shows up across engineering. In digital audio, a tiny amount of noise is added before reducing bit depth so that quiet sounds fade smoothly instead of turning into distortion. Graphics cards dither gradients to hide banding on 8-bit monitors, and modern renderers use blue-noise dithering for transparency and soft shadows. Wherever a signal has to be squeezed into fewer levels, dithering keeps it honest.
Try it yourself
The best way to understand dithering is to play with it. Open the DitherImage tool, drop in a photo, and switch between algorithms and palettes — everything runs locally in your browser, so your images never leave your device.