Process color printing builds every color from four inks: cyan, magenta, yellow and black (the K stands for "key", the plate everything else is registered to). Each ink can only be on or off, so each one is converted into its own halftone — a separation. When the four halftones are printed on top of each other, the overlapping dots mix optically into the full range of colors.
 C at 15°
 M at 75°
 Y at 0°
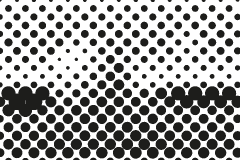 K at 45°
What is moiré?
Overlay two regular patterns that are almost but not quite aligned and a third, larger pattern appears: bands, waves or checkerboards that are not in either original. That interference pattern is moiré. You see it when a striped shirt is photographed on TV, or when two window screens overlap.
Halftone screens are regular patterns, so stacking them invites moiré. The beat between two screens depends on the difference in their angles: the smaller the difference, the larger and more obvious the moiré bands. With two screens at exactly the same angle there is no moiré, but then the dots of different inks fall on top of or right next to each other, and slight misregistration shifts the color dramatically.
The classic angles
The solution, worked out in the era of glass screens, is to spread the screens as far apart as possible. A square grid repeats every 90°, so there is only 90° of useful angle space. Dividing it among three strong colors gives 30° spacing:
| Ink | Angle | Why |
|---|---|---|
| Black (K) | 45° | Darkest ink on the least visible angle |
| Magenta (M) | 75° | 30° from black |
| Cyan (C) | 15° | 30° from black on the other side |
| Yellow (Y) | 0° | Only 15° from its neighbours, but yellow's low contrast hides the moiré |
Some printers swap cyan and magenta (C 75°, M 15°) depending on the content; skin tones are dominated by magenta and yellow, so moving magenta away from yellow can help portraits. Our generator uses C15 M75 Y0 K45 by default and lets you change each angle.
Rosettes
With 30° spacing the screens still interact, but the interference pattern is tiny: small circular clusters called rosettes. At normal print resolutions rosettes are too small to see, and they become part of the texture of printed images. Two kinds exist — clear-centred and dot-centred — depending on how the screens are phased. Rosettes are also what makes enlarged comic and pop-art dots look the way they do.
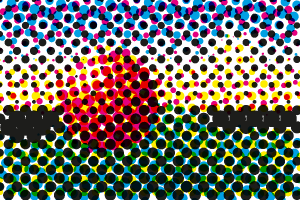 C15 M75 Y0 K45
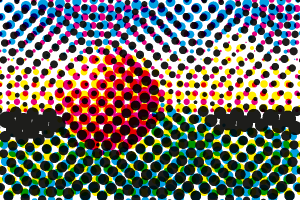 C40 M45 K50
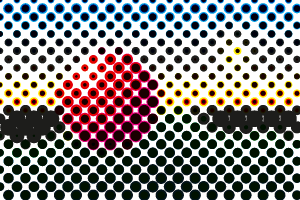 All 45°
Angles for screen printing
Screen printing adds a fifth pattern: the mesh itself, with threads at 0° and 90°. Any halftone close to 0°, 45° or 90° can interfere with it. That is why single-color screen printers use 22.5°, and why CMYK jobs on mesh often shift the whole set by 7.5°: for example C 22.5°, M 52.5°, Y 7.5°, K 82.5°. Simulated process and index printing often avoid the problem entirely with the same angle on every screen plus careful registration, or with square index dots instead of halftones. See halftones for screen printing.
Why not just use one angle?
With every screen at the same angle, dots of different colors land in the same places. With perfect registration that would be fine — but real presses shift by fractions of a dot, and a shift of half a cell changes cyan-on-magenta (blue) into cyan-beside-magenta (lighter, different blue). Colors become unstable across the sheet. Different angles make the color mix statistically even no matter how registration drifts. Stochastic (FM) screening avoids angles altogether by using random dots — great for fine detail, but it does not give the classic halftone look.
How CMYK separation works in this generator
- Each pixel's red, green and blue values are converted into cyan, magenta and yellow (their complements).
- The grey part common to all three — the darkest value they share — moves into black. This is grey component replacement, and it keeps neutrals and shadows clean.
- Each of the four channels is screened at its own angle with the dot shape you choose.
- The four layers are drawn with multiply blending, which is how transparent inks combine on paper.
This is a simple, device-independent separation intended for effects, previews and screen-printing artwork. A commercial press uses ICC profiles with total ink limits and the RIP generates its own halftones, so you would not normally send pre-screened CMYK to an offset printer.
Creative uses
- Pop art and comics: large cells (16–28 px) make the rosettes into a bold design element. See the pop art preset.
- Riso and screen-print planning: preview what overprinted spot colors will look like before making stencils.
- Teaching: change one angle at a time and watch moiré appear.
Try it in the CMYK halftone generator, or read what is a halftone for the basics.